Cross the Streams
Shade some of the cells black so that all black cells are connected and no square is entirely shaded black. The clues outside the grid gives the contents of the corresponding row/column, reading from left to right and from top to bottom. A number means a group of consecutive black cells; two different groups in the same row/column must be separated by at least one white cell. A question mark indicates a single group of unknown size; an asterisk indicates an unknown number of groups (which may differ in size, and there might be no group at all).
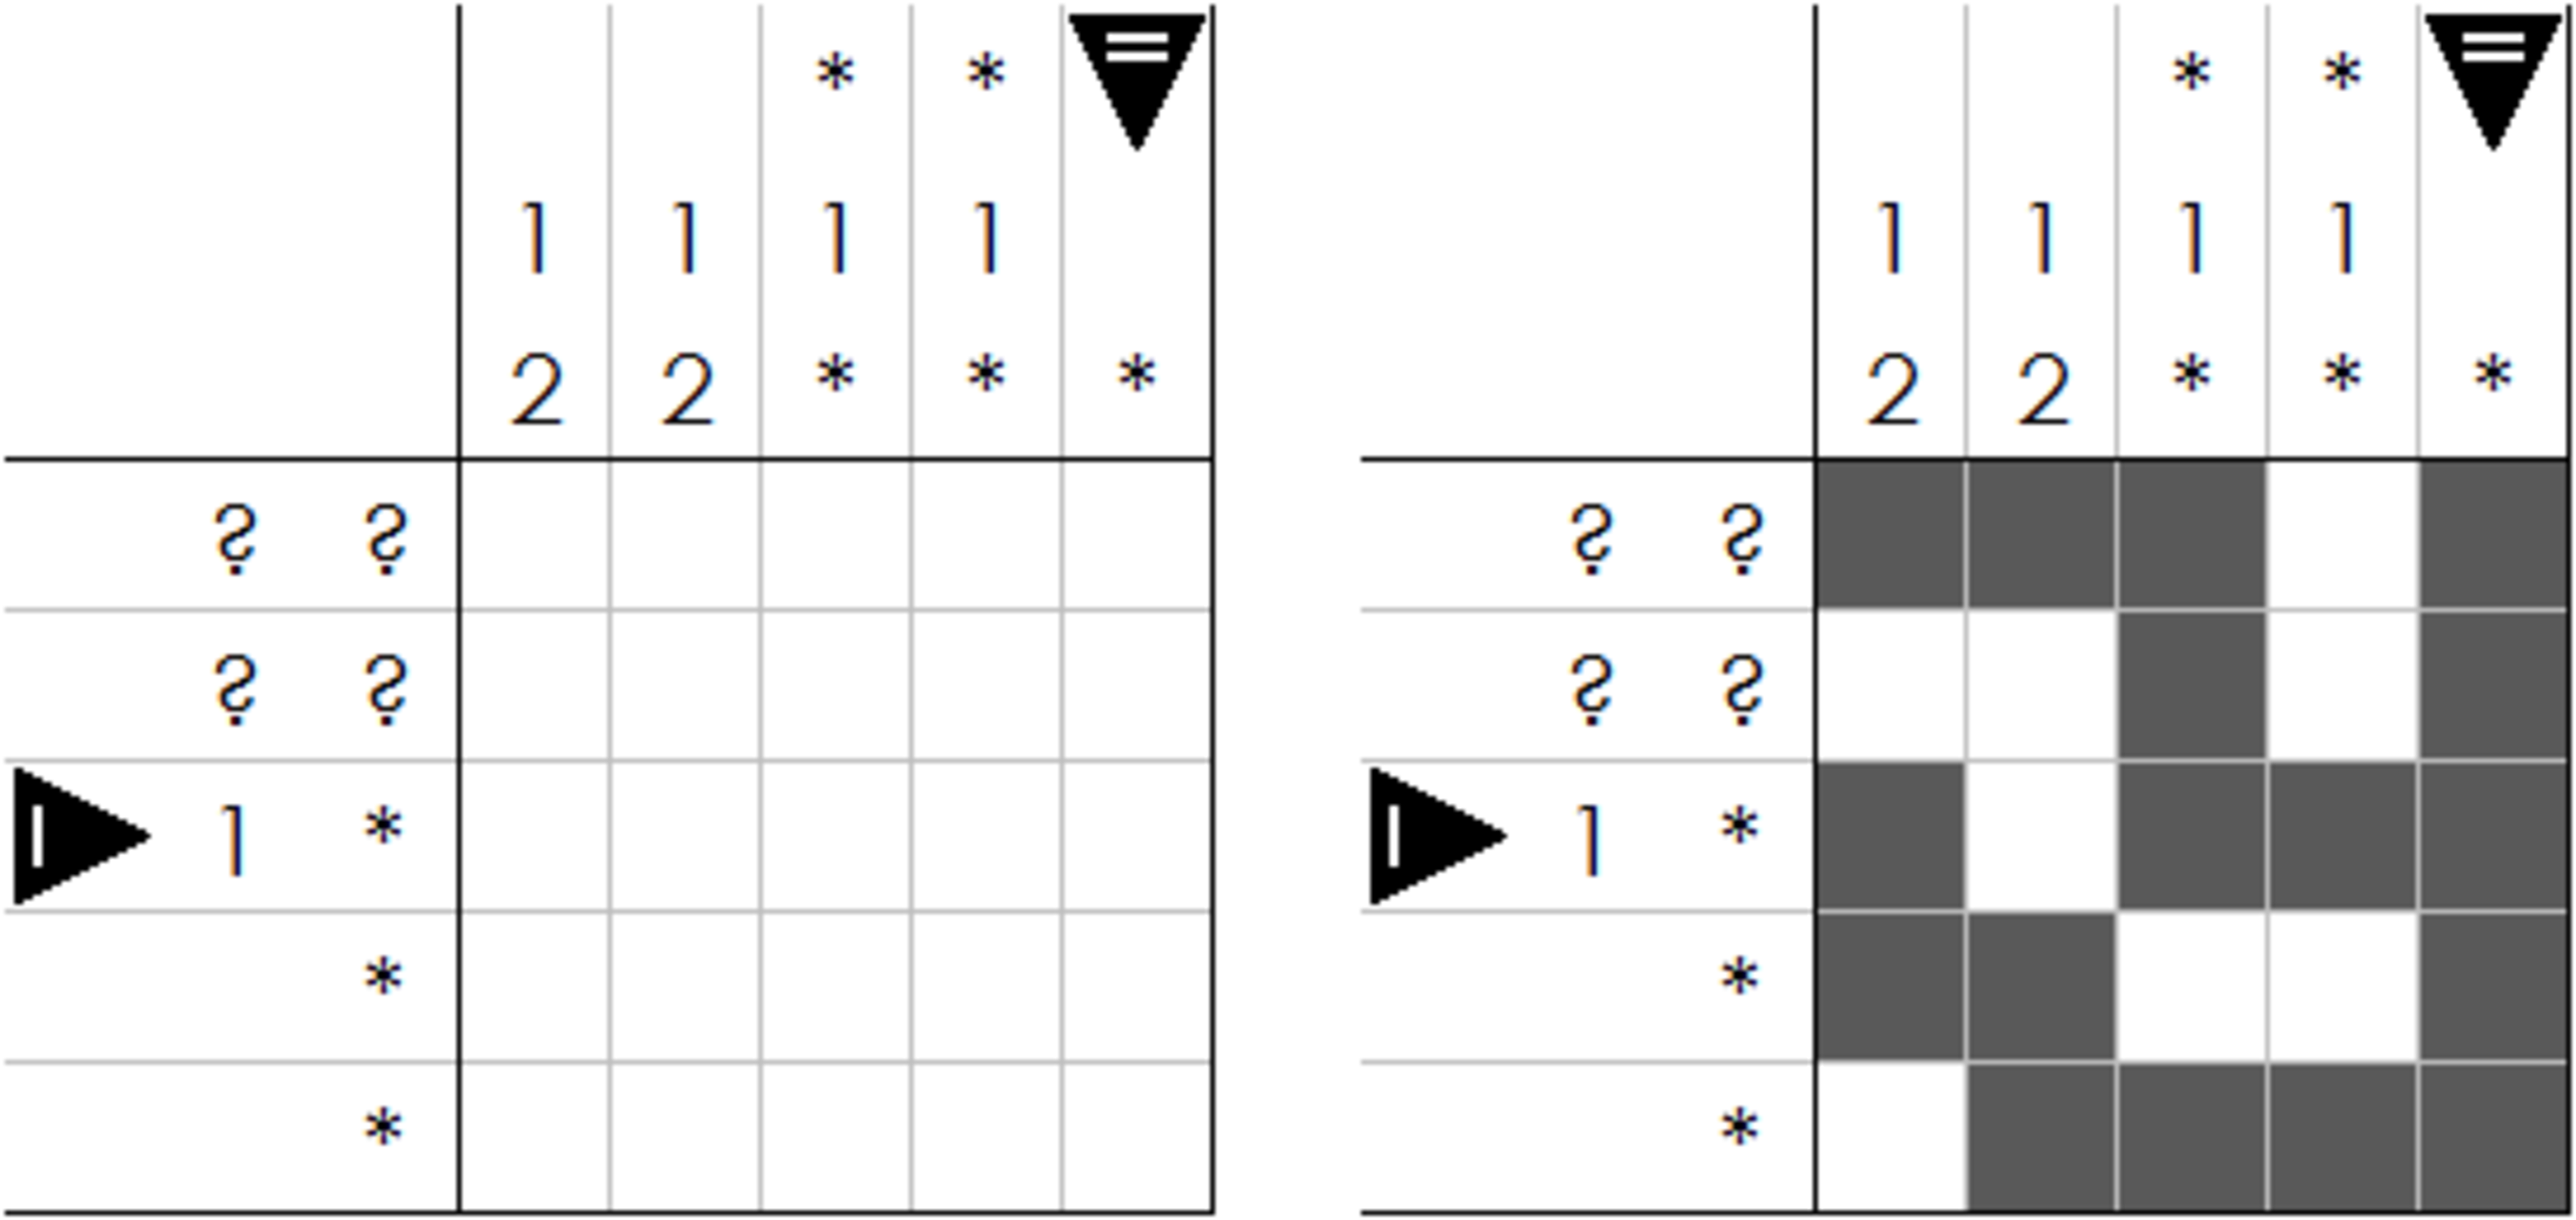
Consider the following example (puzzle on the left, solution on the right):
-
The first and second columns both say
1 2; that means there are two blocks of black cells; the first has length 1, the second has length 2. -
The first and second rows both say
? ?; that means there are two blocks of black cells, but now both of unknown length. -
The third row says
1 *; that means there is at least one block of black cells; the first block in this row has length 1. -
The third and fourth columns both say
* 1 *; that means there is at least one block of black cells, one of which has length 1. Which of them is the 1 isn't known (and may even be ambiguous, as in the fourth column). -
The remaining three lines (fourth row, fifth row, fifth column) have a single asterisk
*, meaning there is absolutely no information.
You can also see this page for another example.
Your task is to solve the following Cross the Streams puzzle.

Enter your answer as the lengths of black cells in the marked row and column. For example, in the example above, the marked row has black cells of length 1 followed by length 3, and the marked column has black cells of length 5, so your answer would be .
The answer is 12341.
This section requires Javascript.
You are seeing this because something didn't load right. We suggest you, (a) try
refreshing the page, (b) enabling javascript if it is disabled on your browser and,
finally, (c)
loading the
non-javascript version of this page
. We're sorry about the hassle.
This is Puzzle 94 on my blog.
A complete solution will need some time to write up. However, if you need a nudge in the right direction, look at R5 and C5. This divides the puzzle into four quadrants. How many can you connect? This puzzle is not intended to be an easy puzzle, after all.